

How To Register User Using Strip Checkout + Auth0
1. Open up stripe account
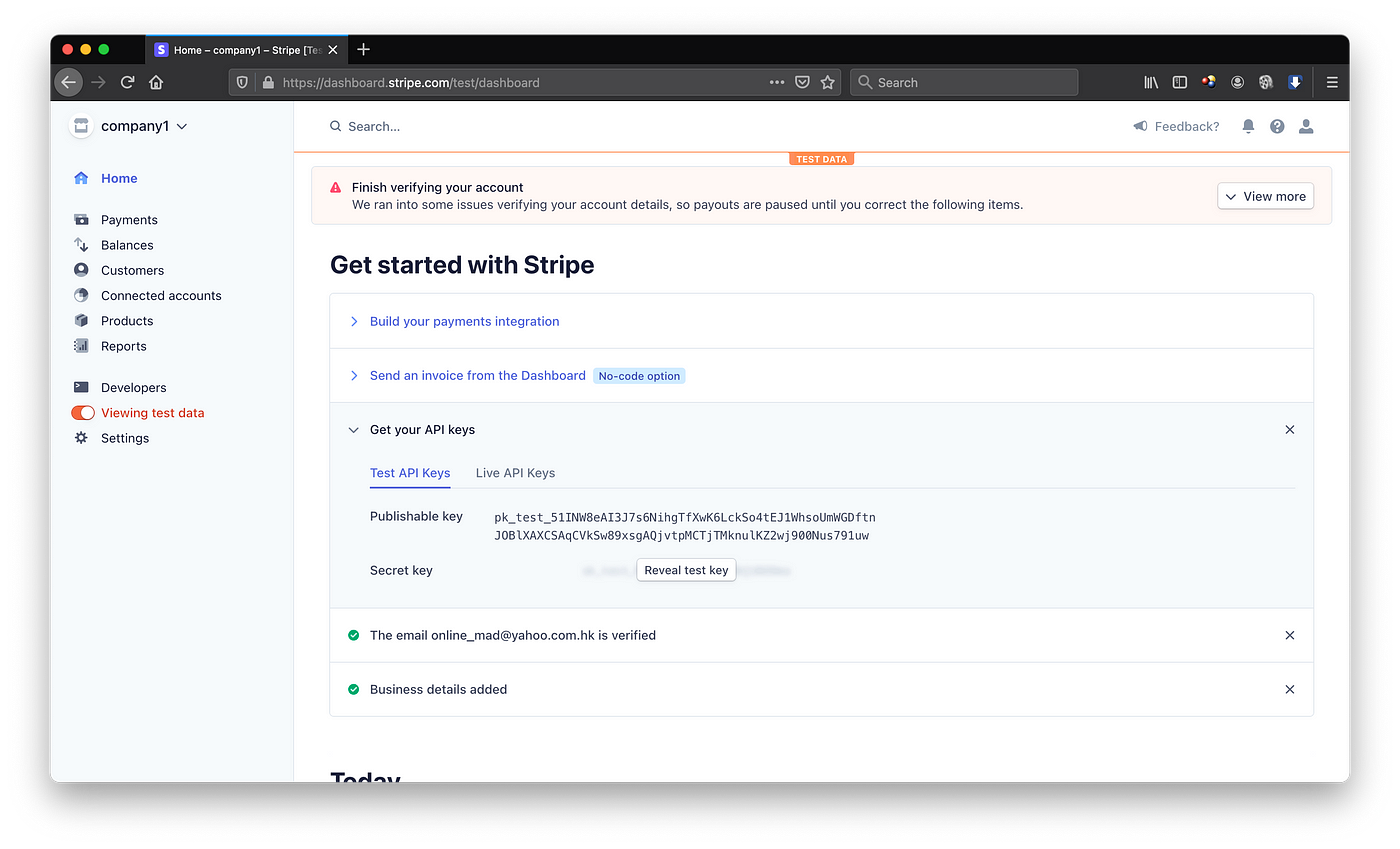
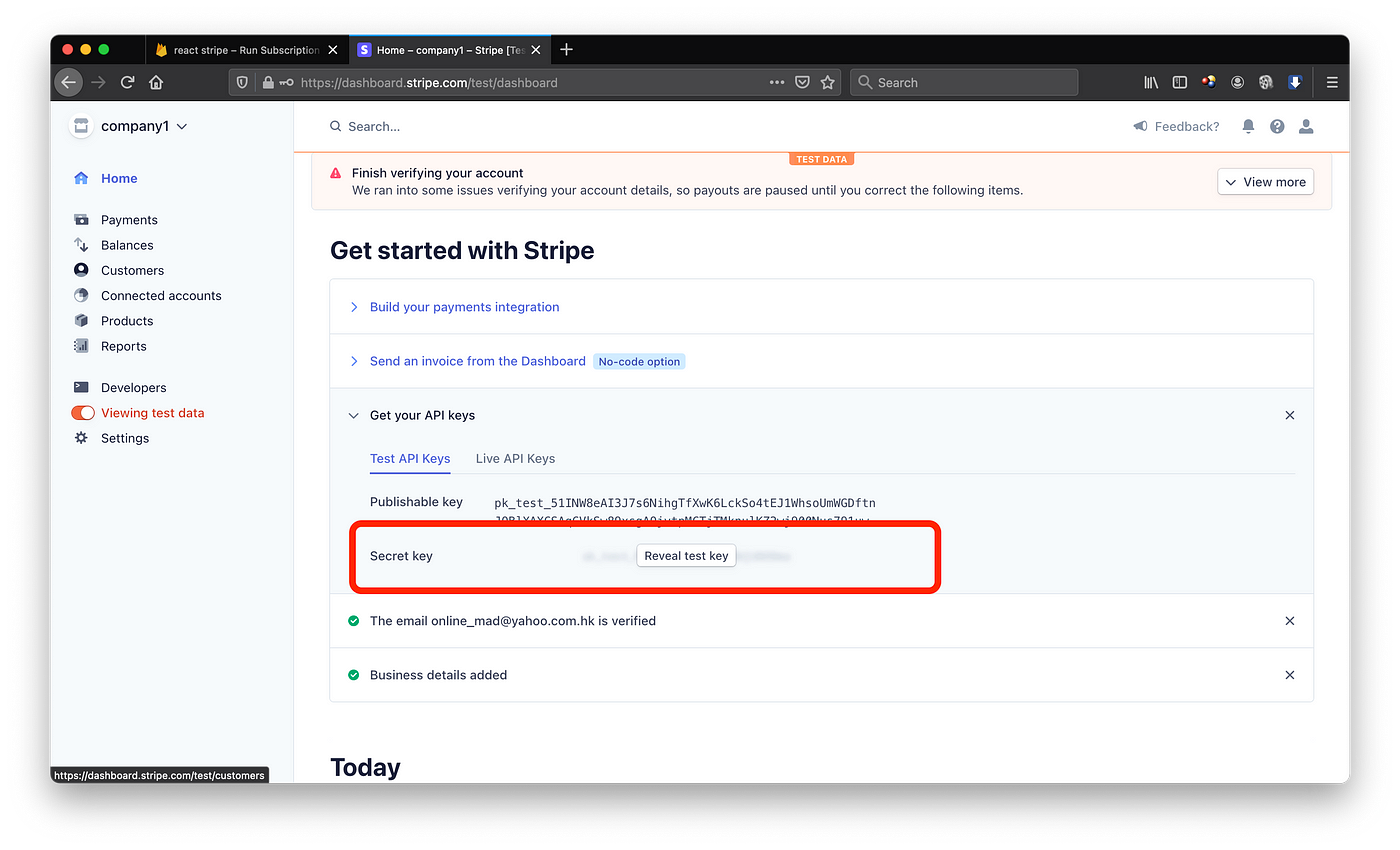
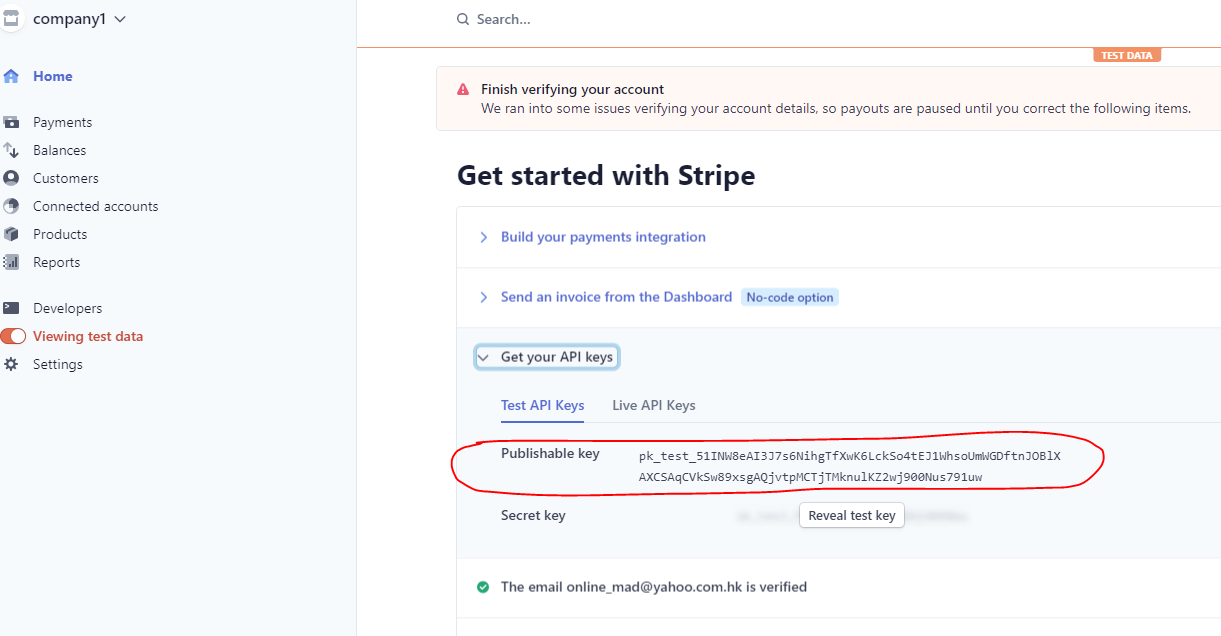
We created an business relationship named "Company1". We toggle viewing test data on the left side menu. And then yous should see Get your API keys, these are for connecting the Firebase with exam information.
2. Create Firebase project

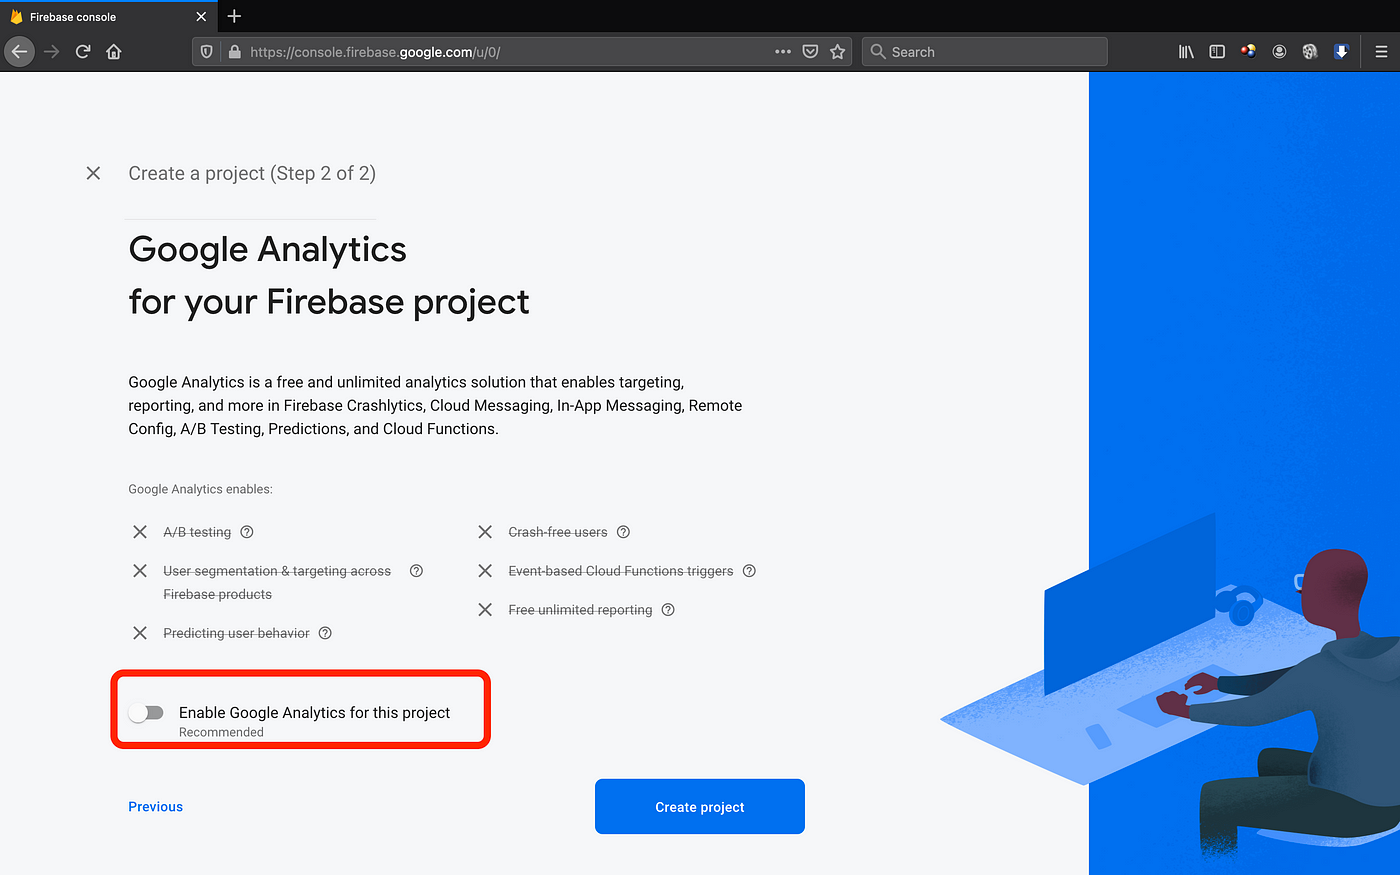
We create a Firebase project and then disable the Google Analytics for this project.
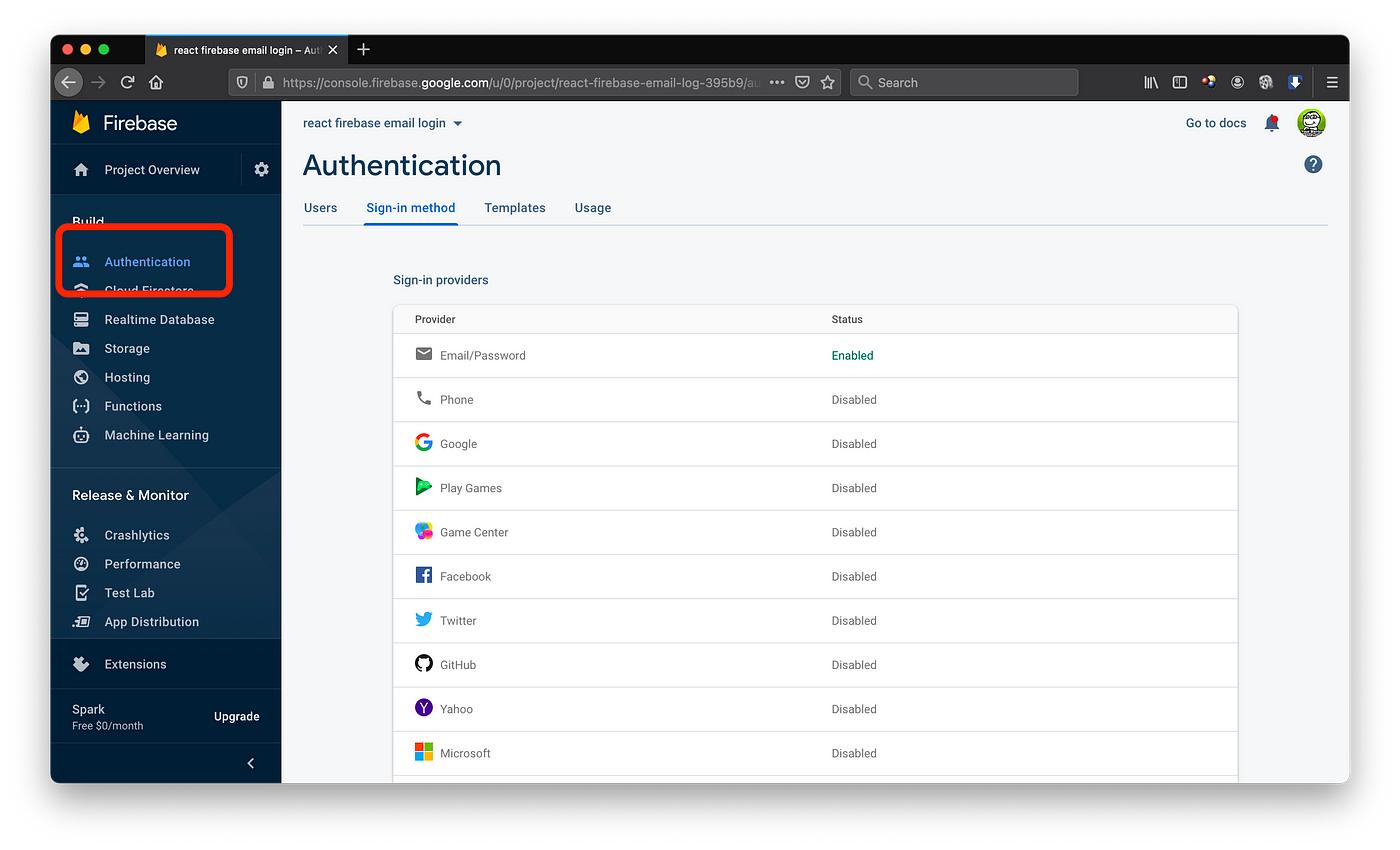
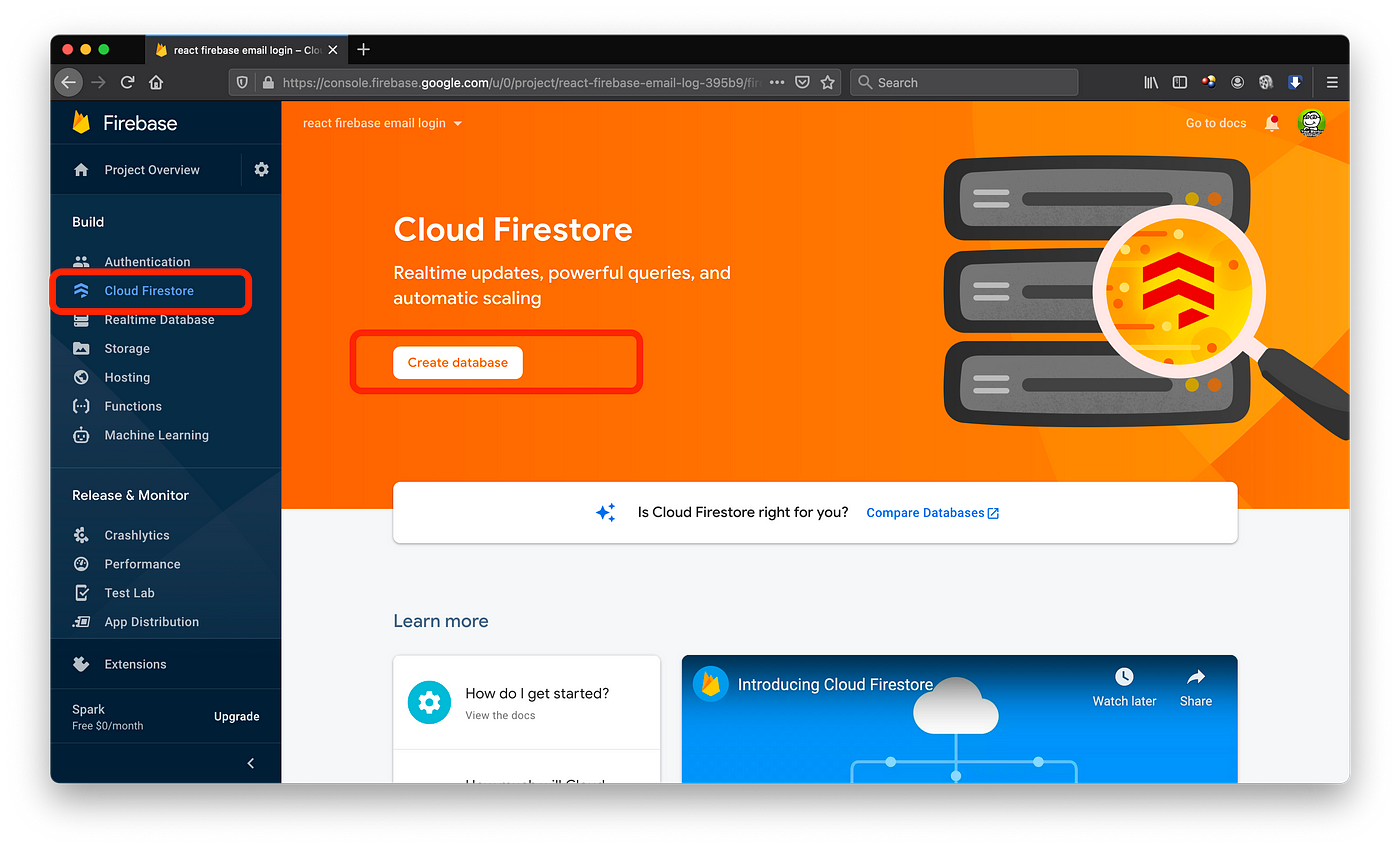
After that, we go to turn on the email hallmark and get-go the Cloud Firestore.
3. Install Firebase stripe extension
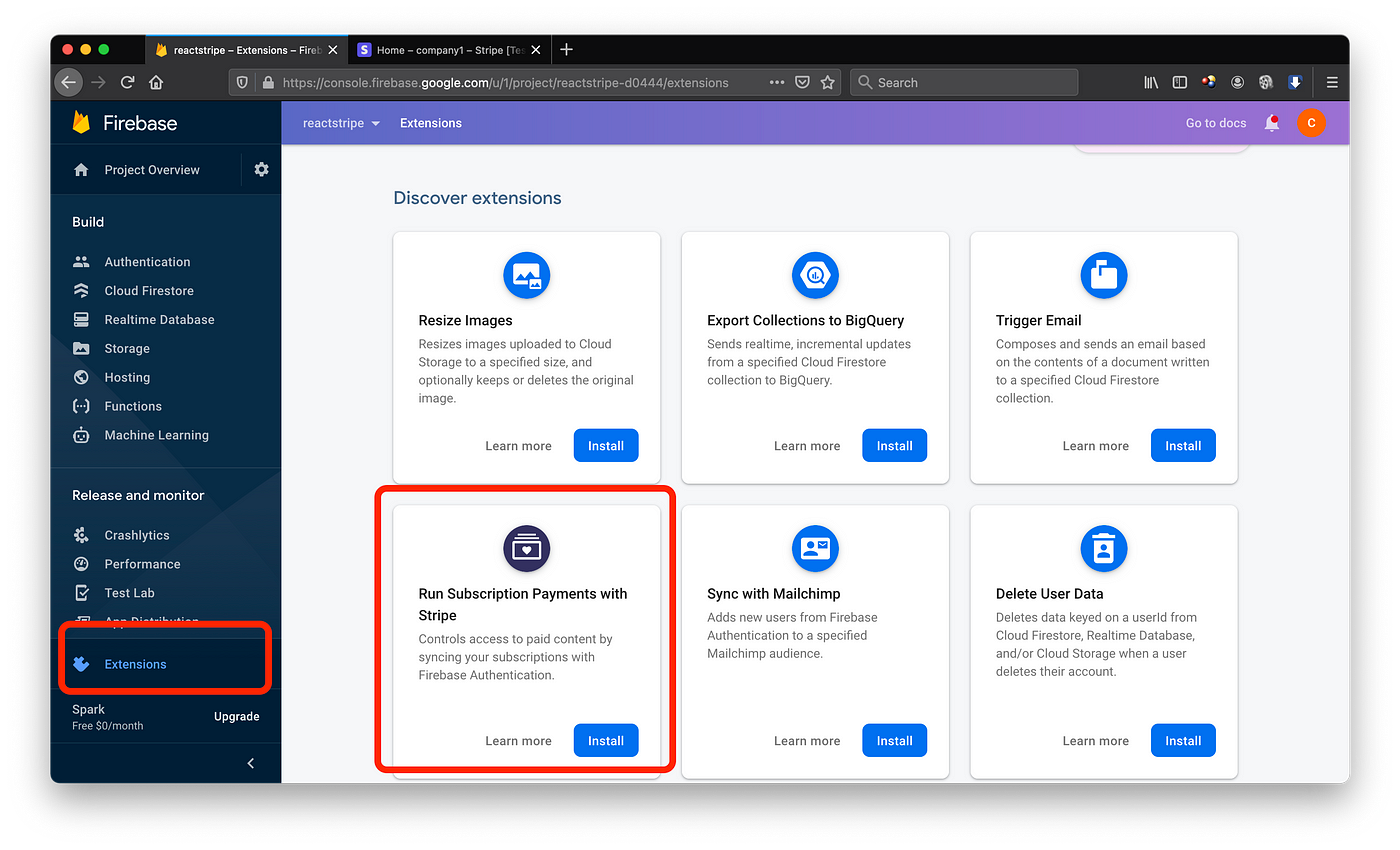
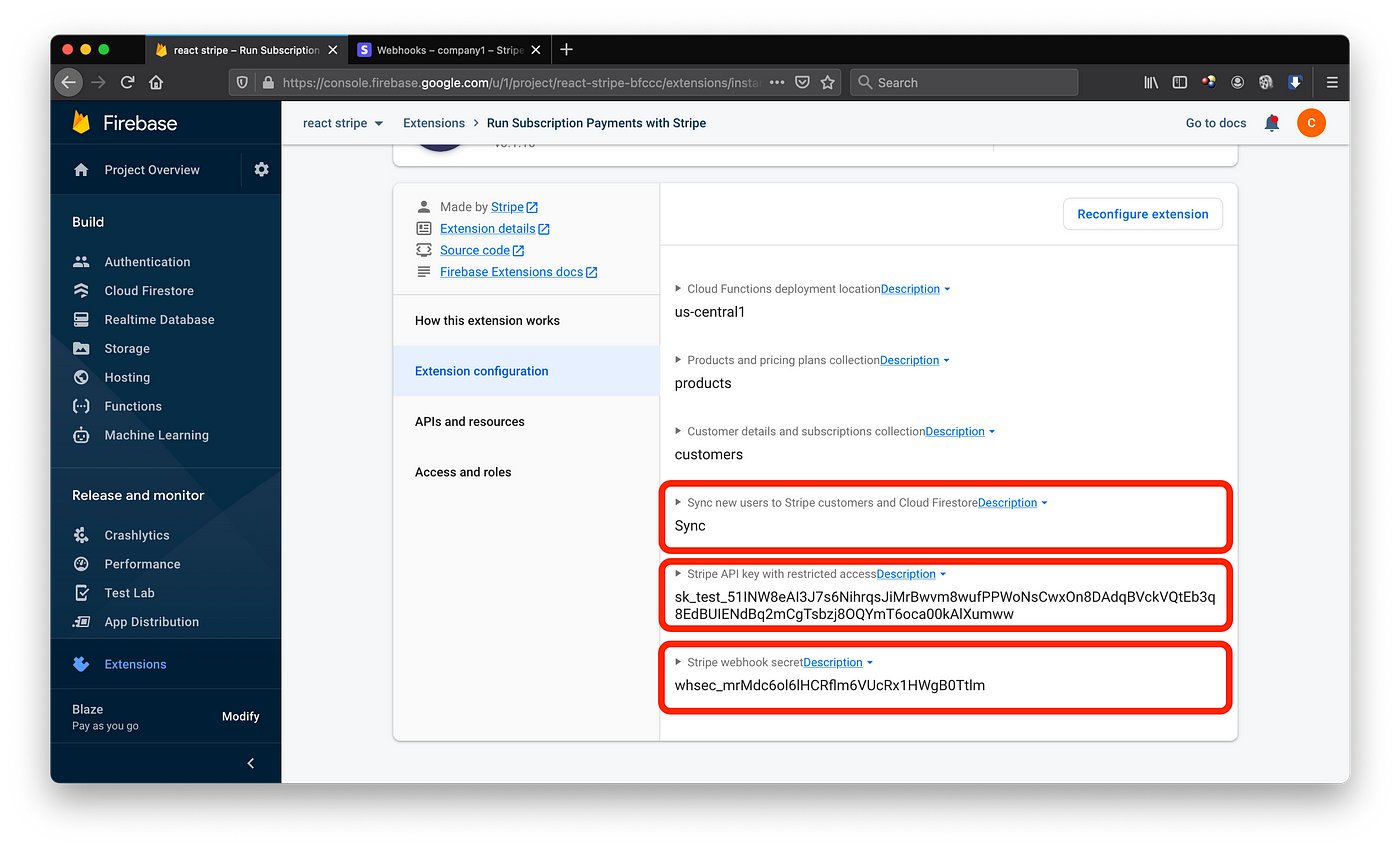
Nosotros click on the extension carte and click install the stripe extension. Subsequently the installation finish, click on "How this extension works"
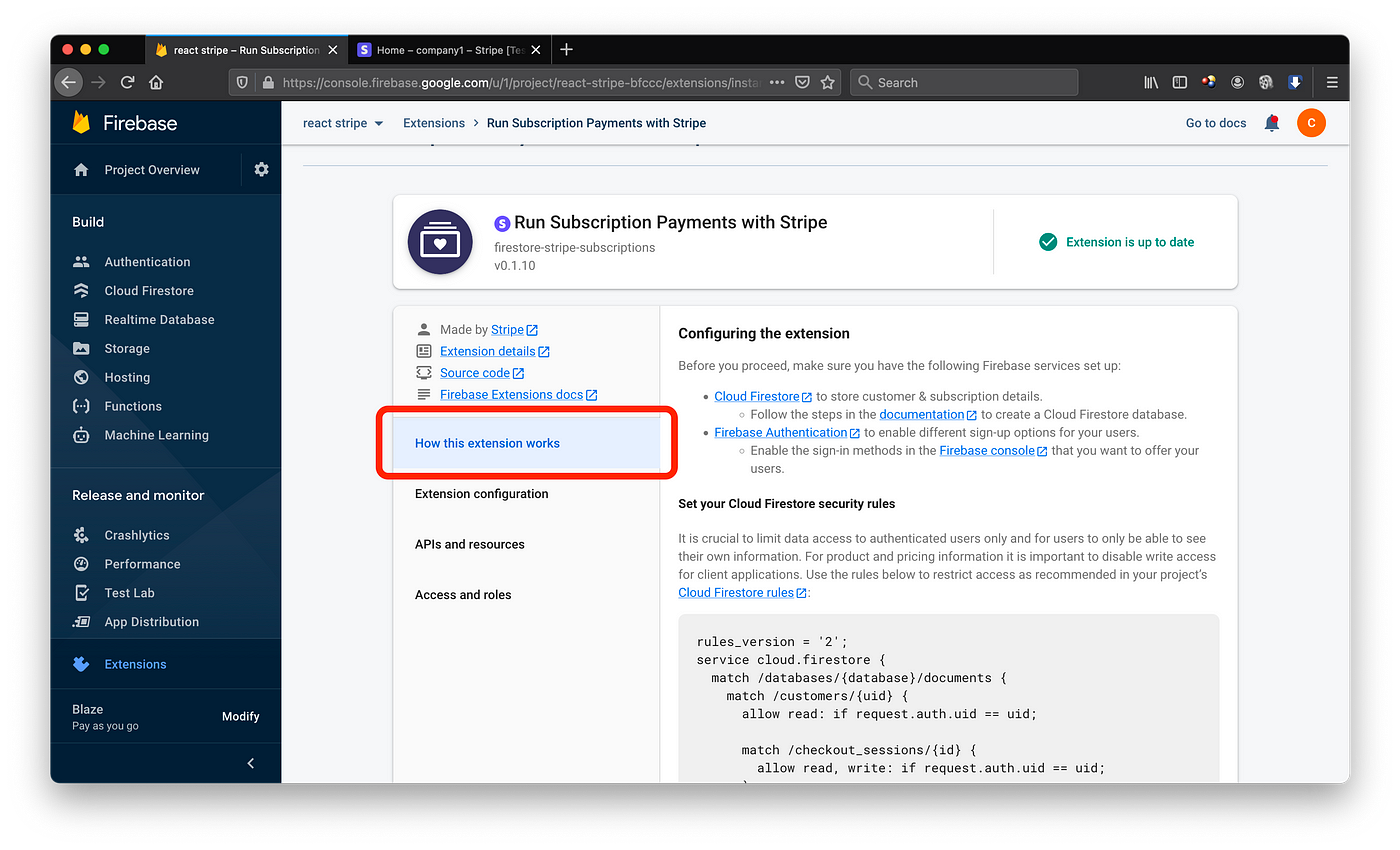
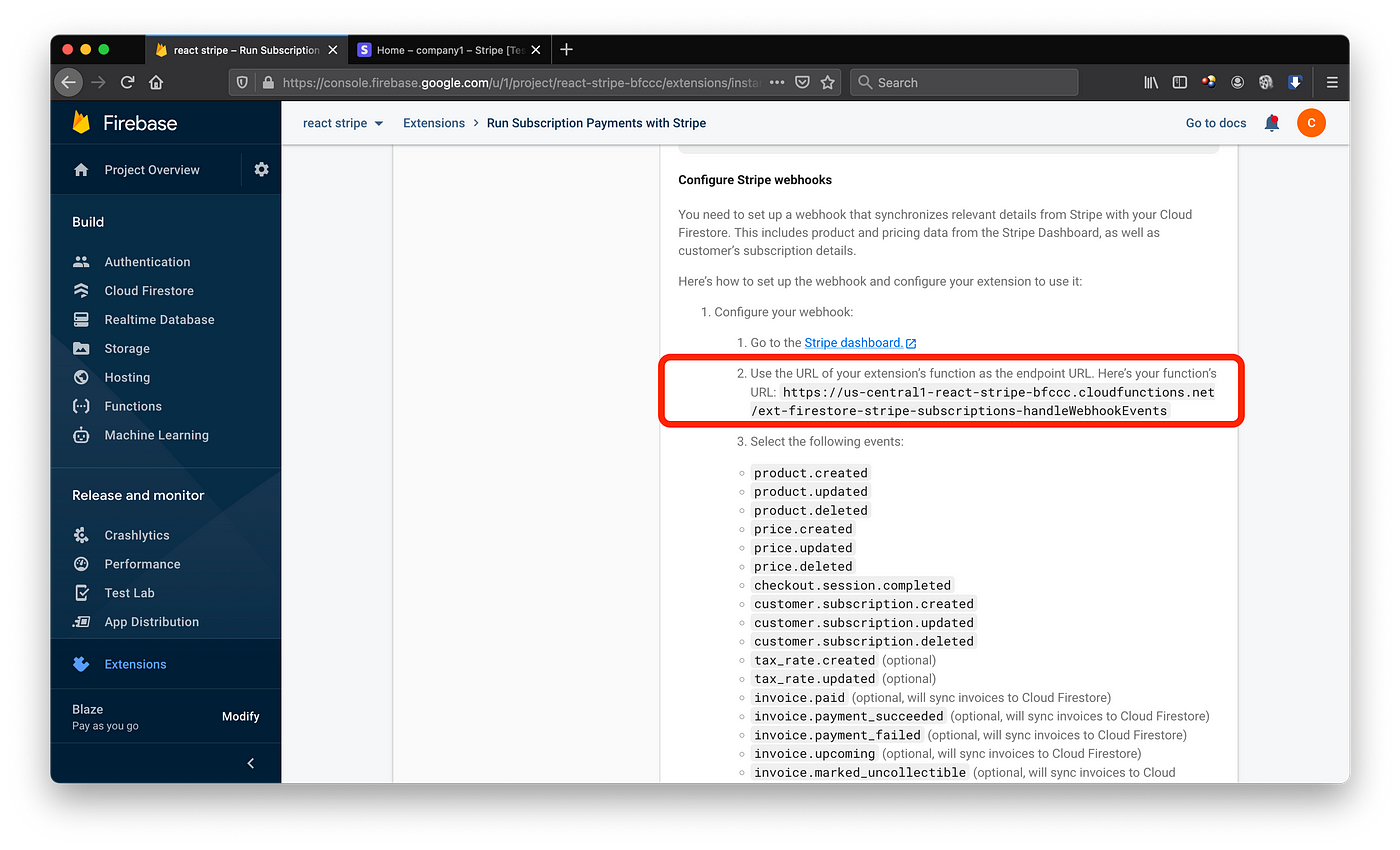
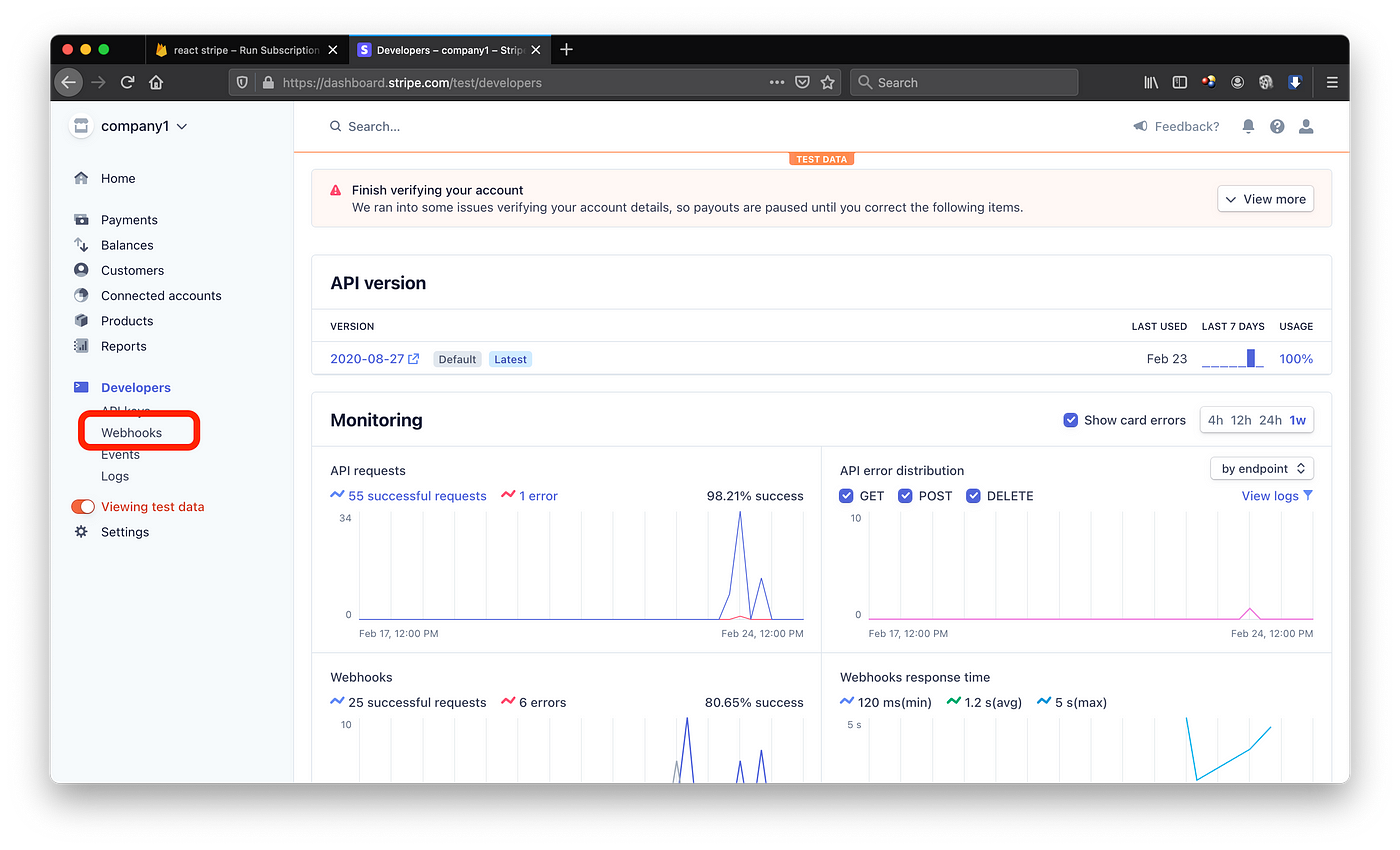
Under the footstep 2 of the "Configure Stripe webhooks", we re-create this endpoint to the Stripe.
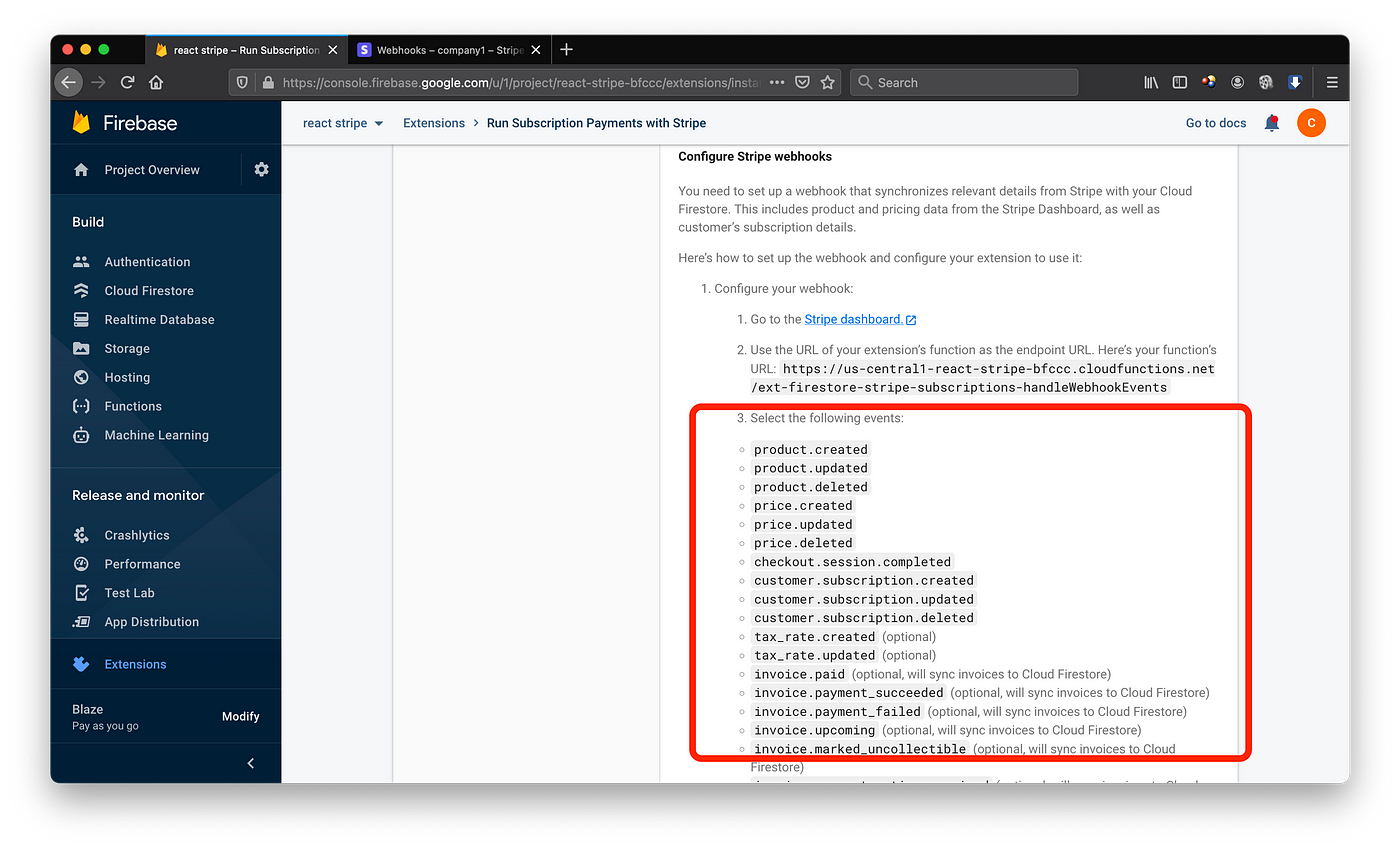
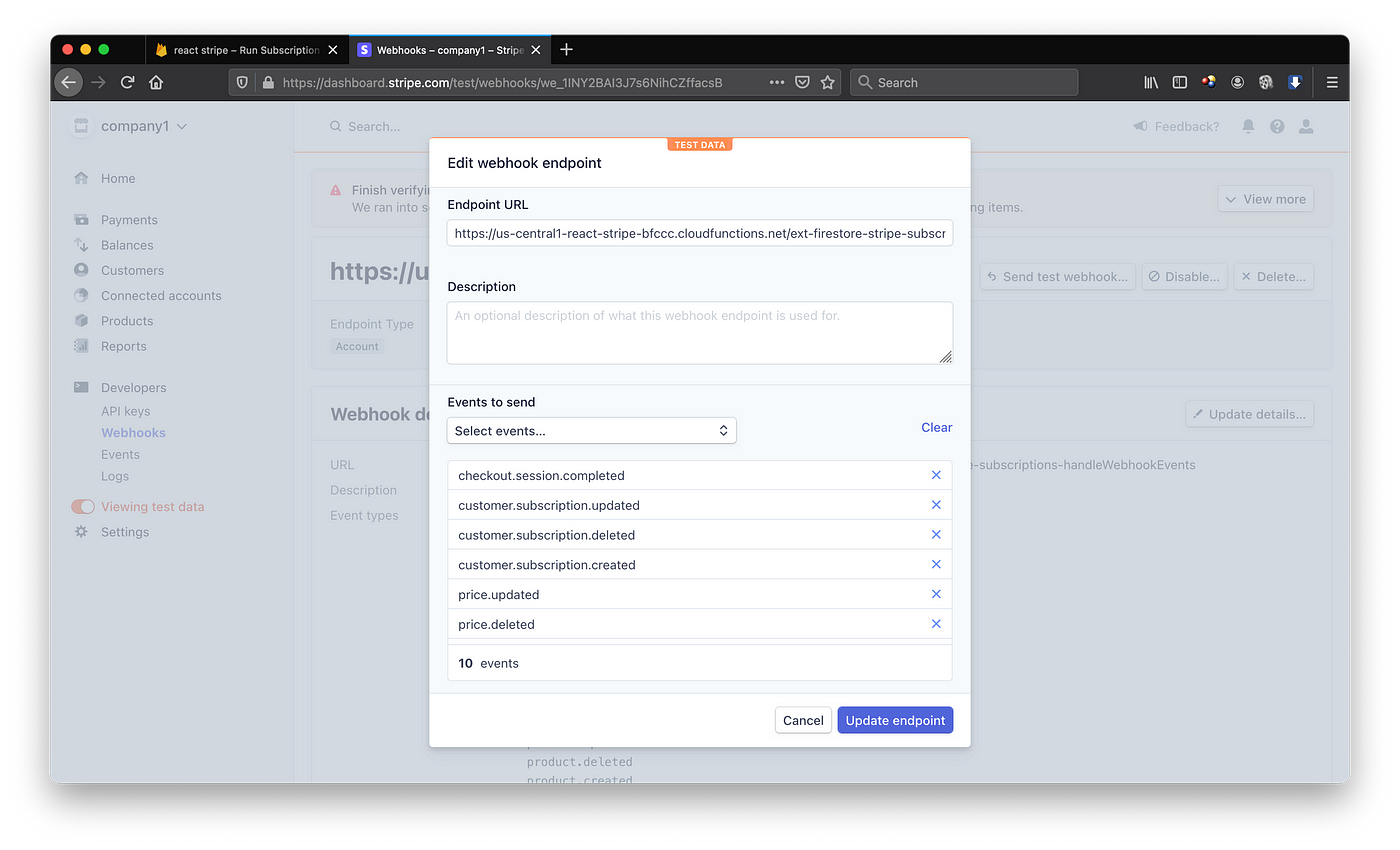
From the step 3 of the "Configure Stripe webhooks", we add those events to the endpoint.
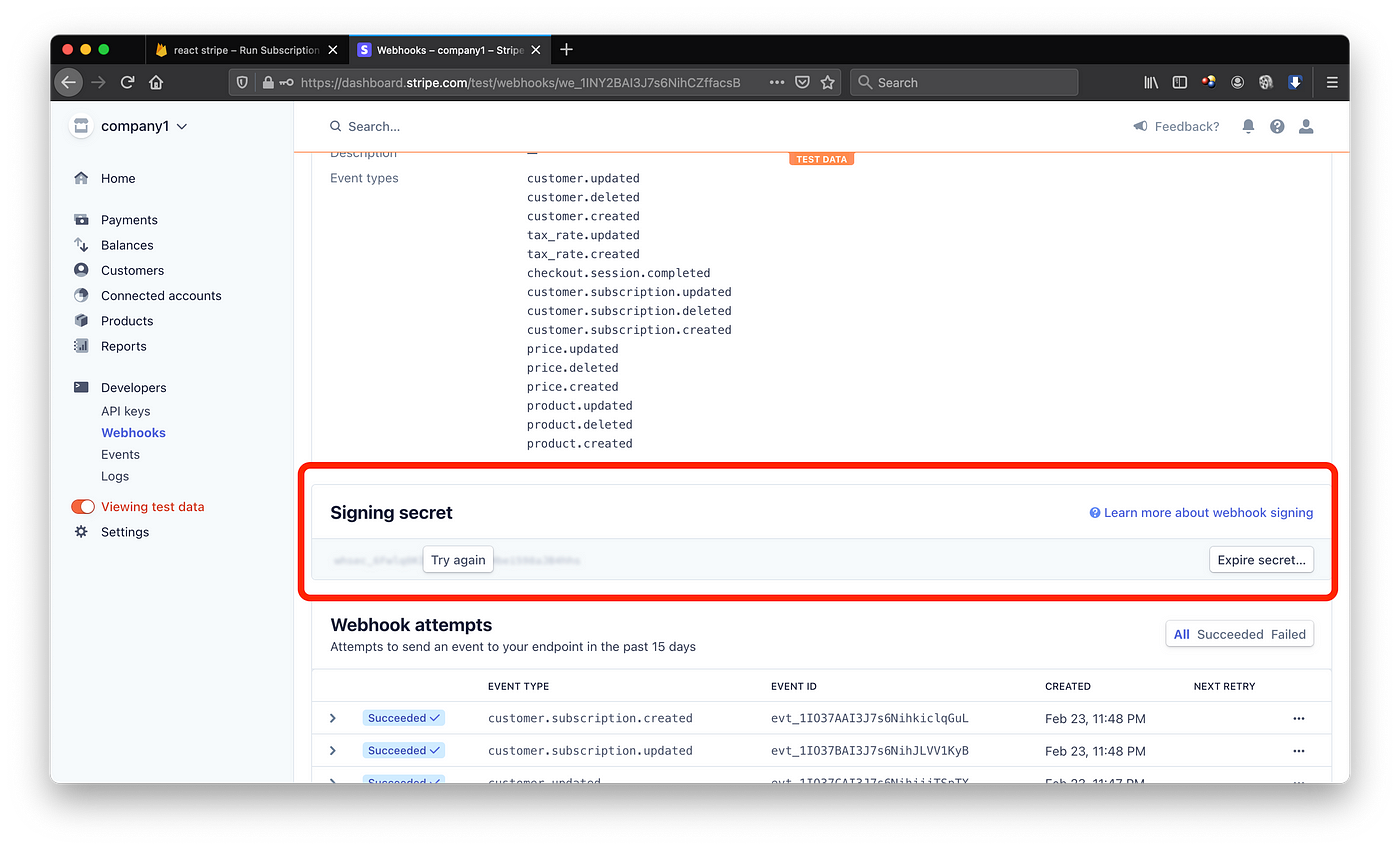
Step iv of the "Configure Stripe webhooks", we copy the "signing secret" from Stripe and paste information technology to the "Stripe webhook secret" of the Firebase.
We also copy the "Hush-hush key" of the "Test API key" to the "Stripe API key with restricted access". Think to turn on the Sync function besides.
Subsequently that we click save.
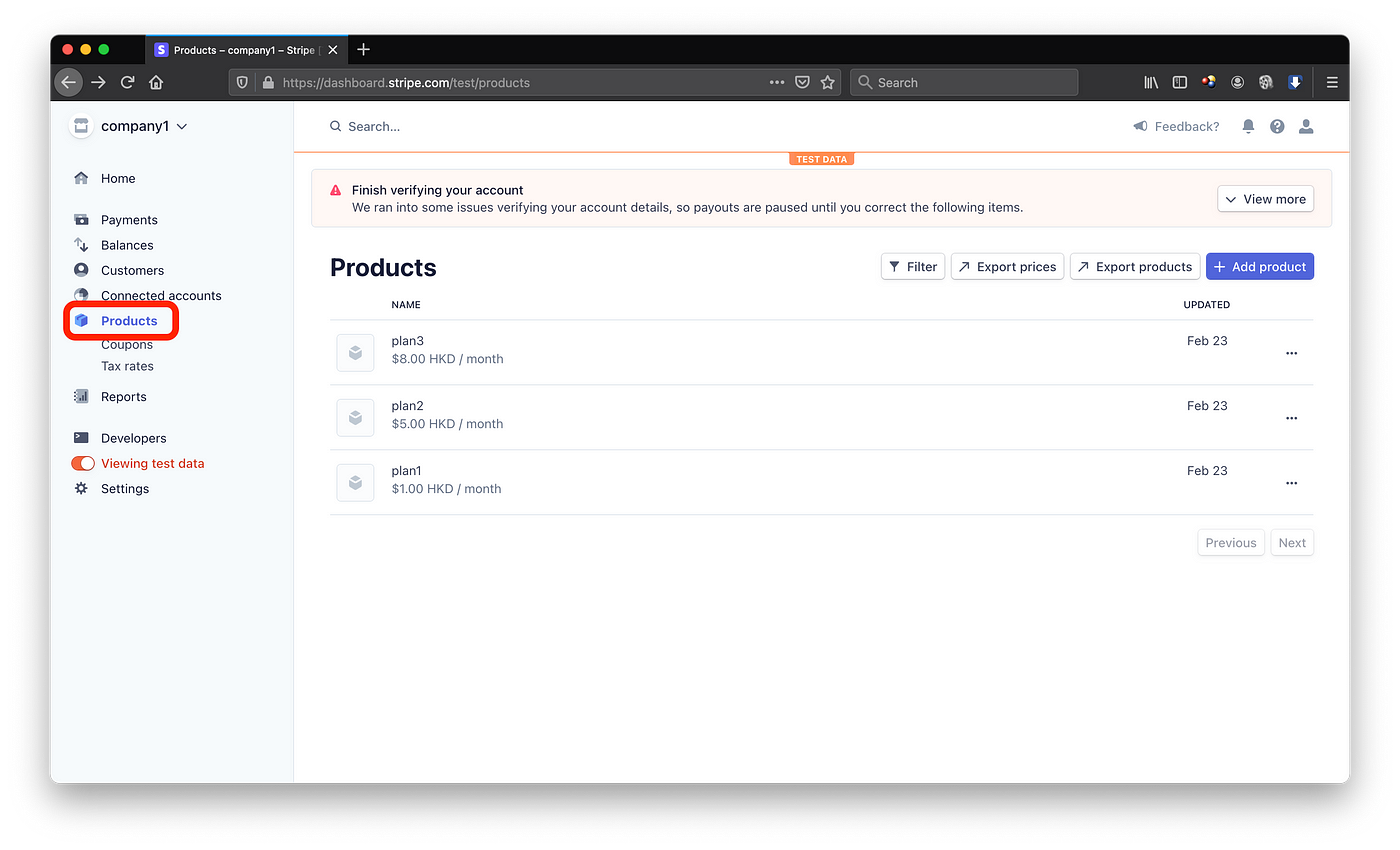
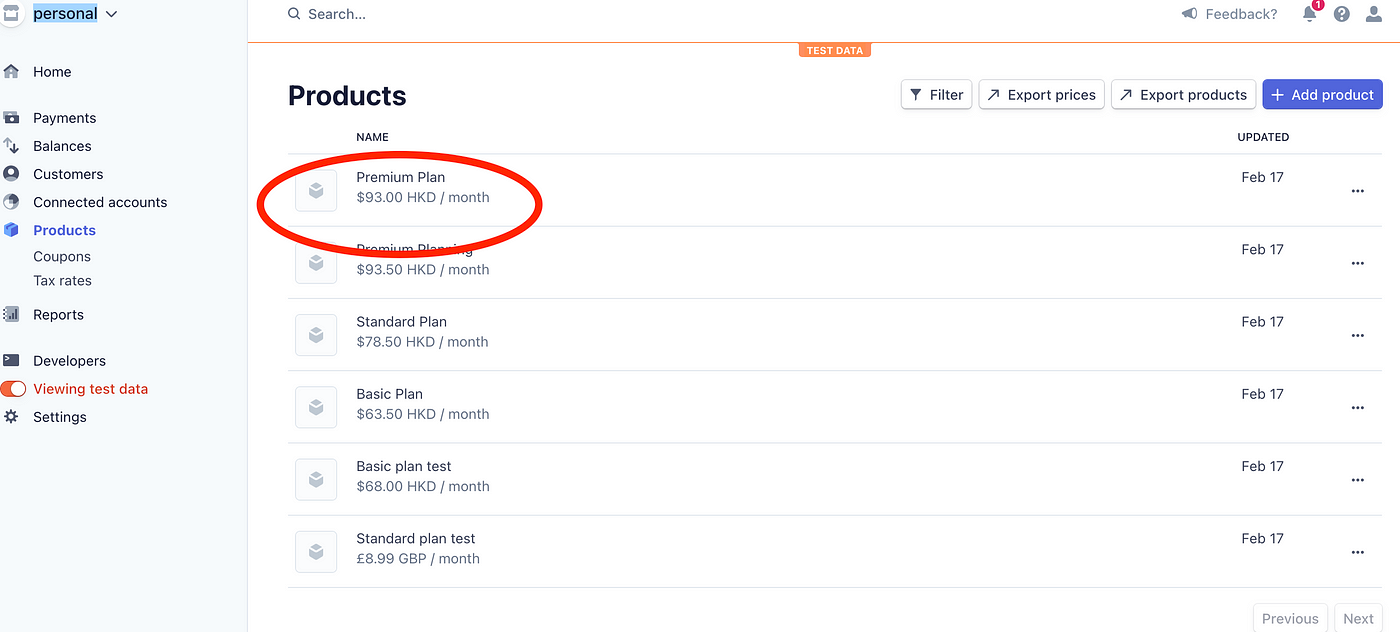
four. Add together the products or plans
Next is we are going to add together the products or subscription plans to the Stripe. So we need to click on the "Products" on the side menu and click "+Add together production".
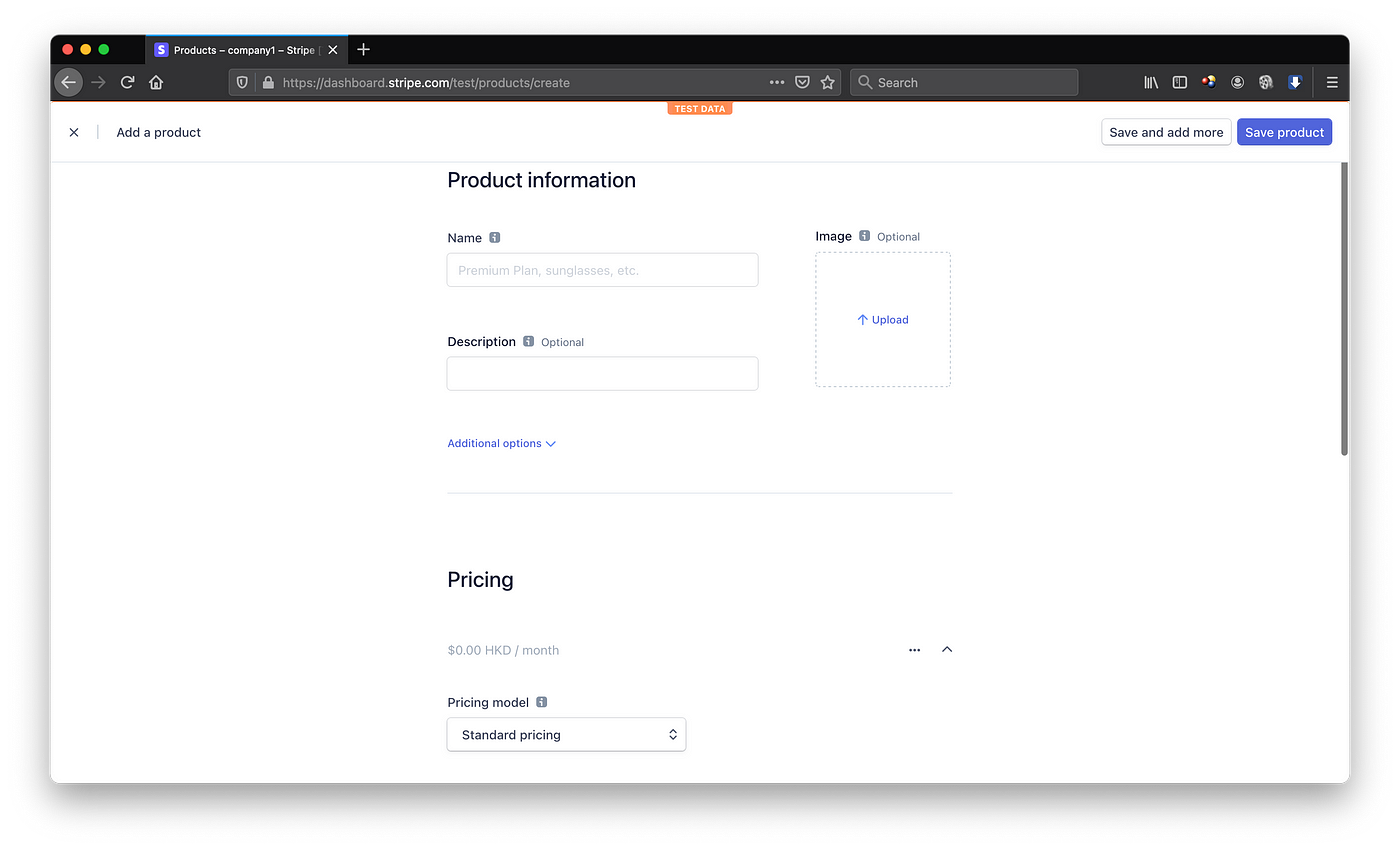
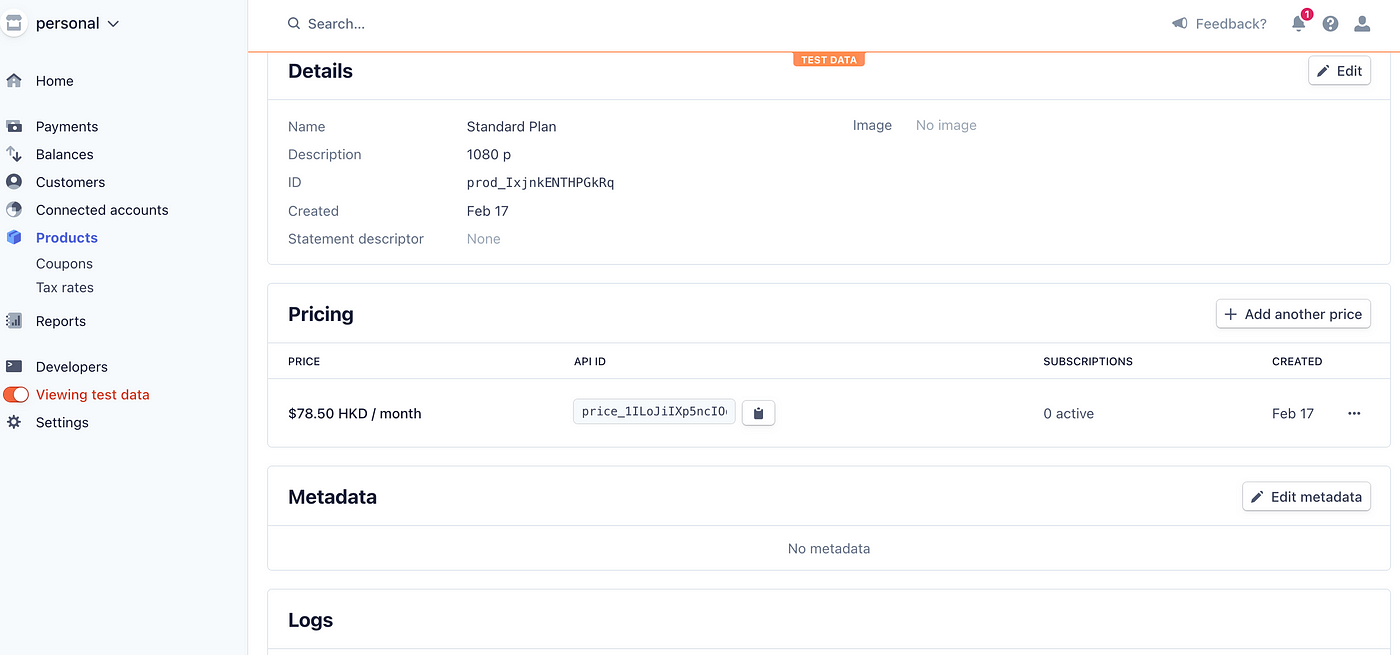
We enter the name, description and pricing of the products, then click "Save product", if you just accept one production or click "Salvage and add more" if yous have more than then i production, so you can continue to add together more products

After we entered all the products information, nosotros click on the "Settings" and then "Customer portal".
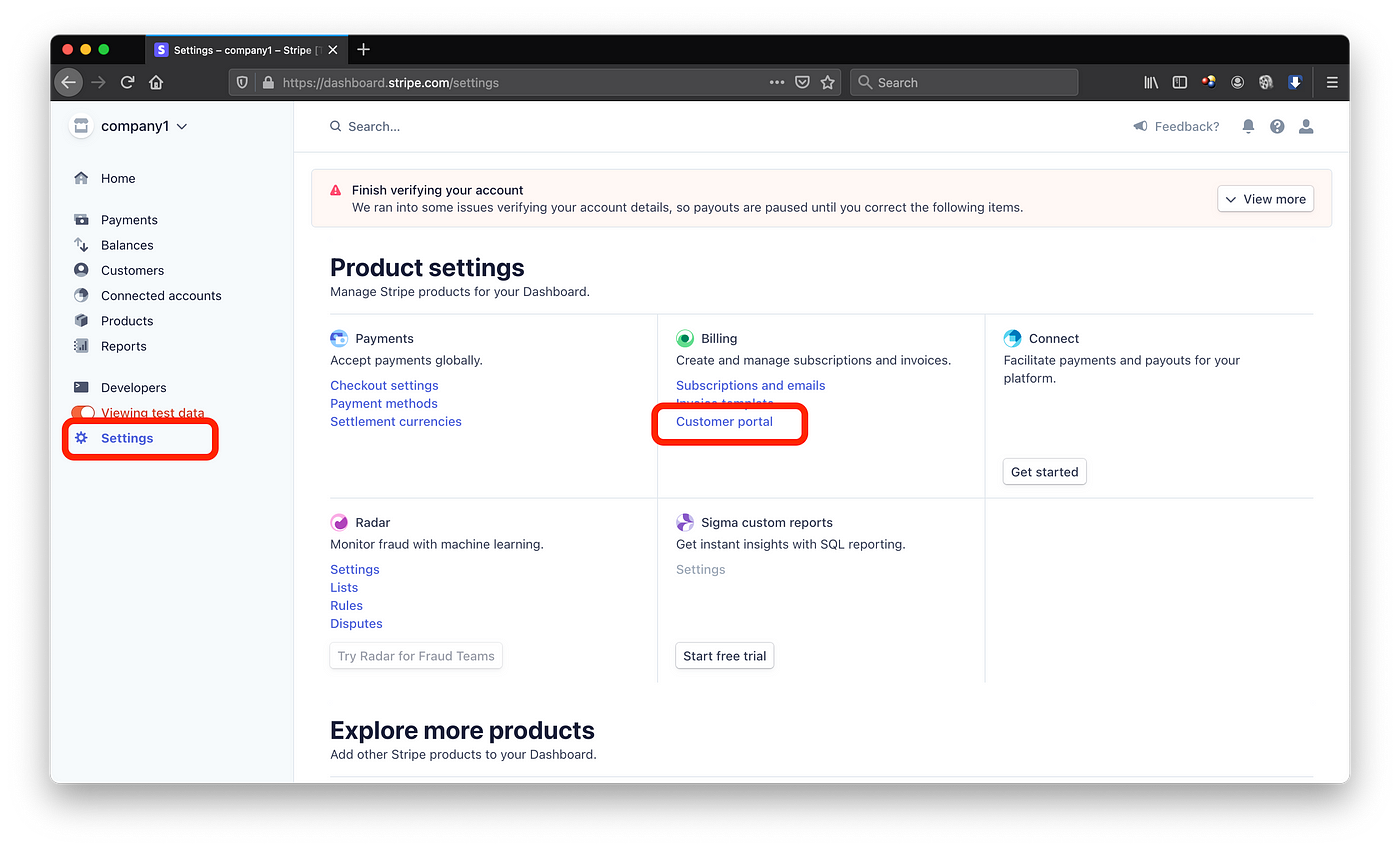
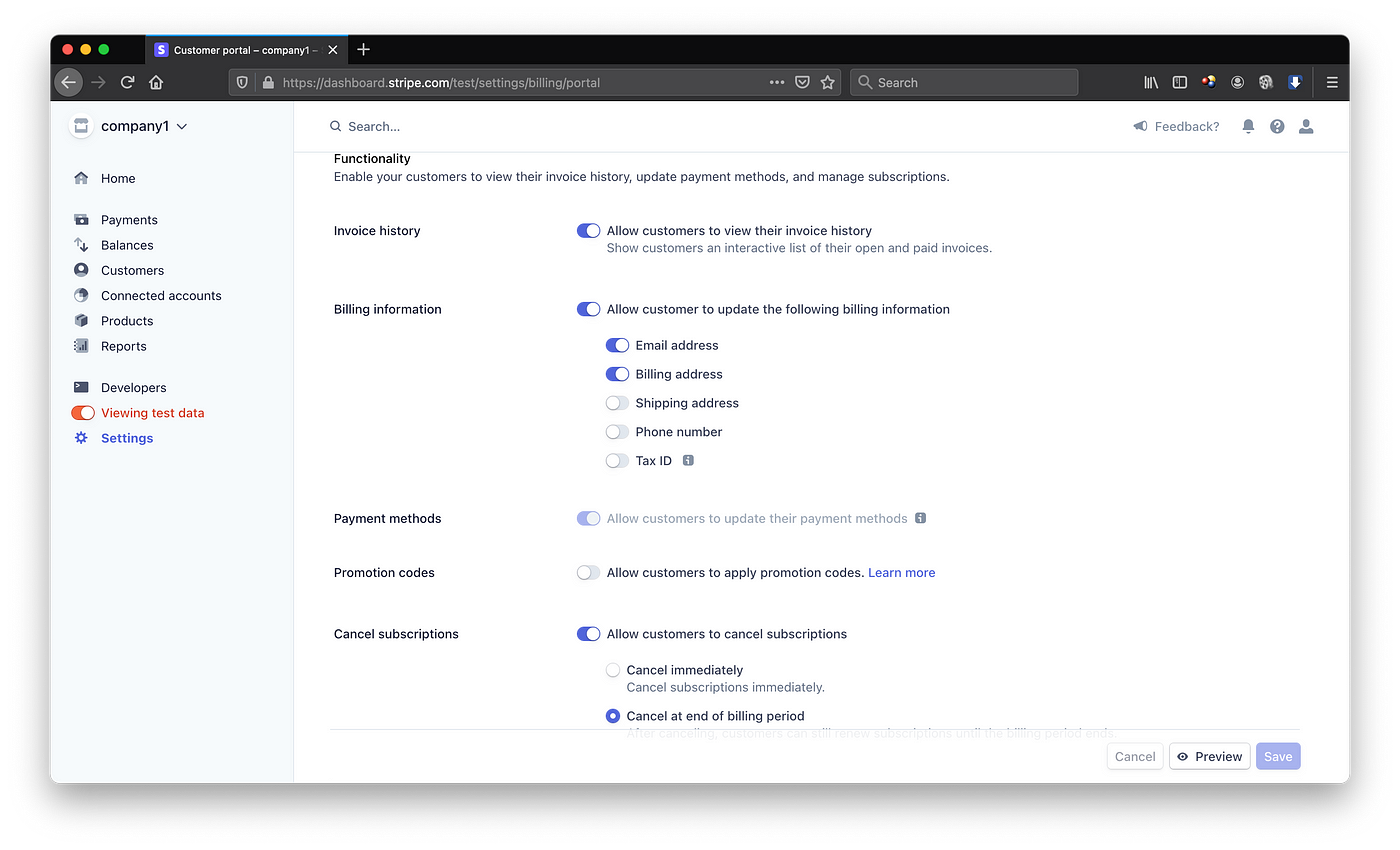
We turn on
"Let customers to view their invoice history"
"Allow customer to update the following billing information"
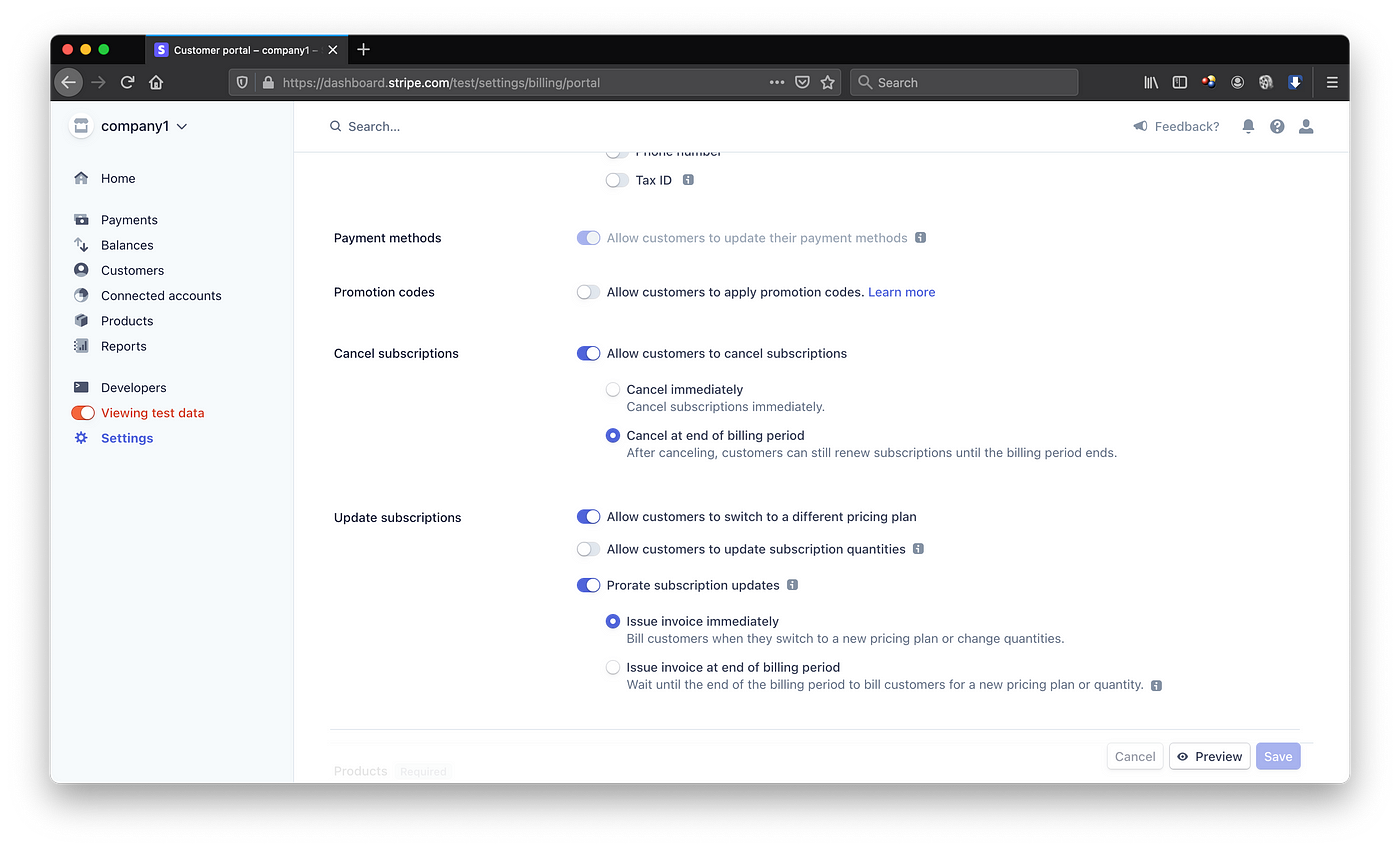
"Allow customers to cancel subscriptions"
"Allow customers to switch a different pricing programme"
Then we demand to add the products to the "Added products"
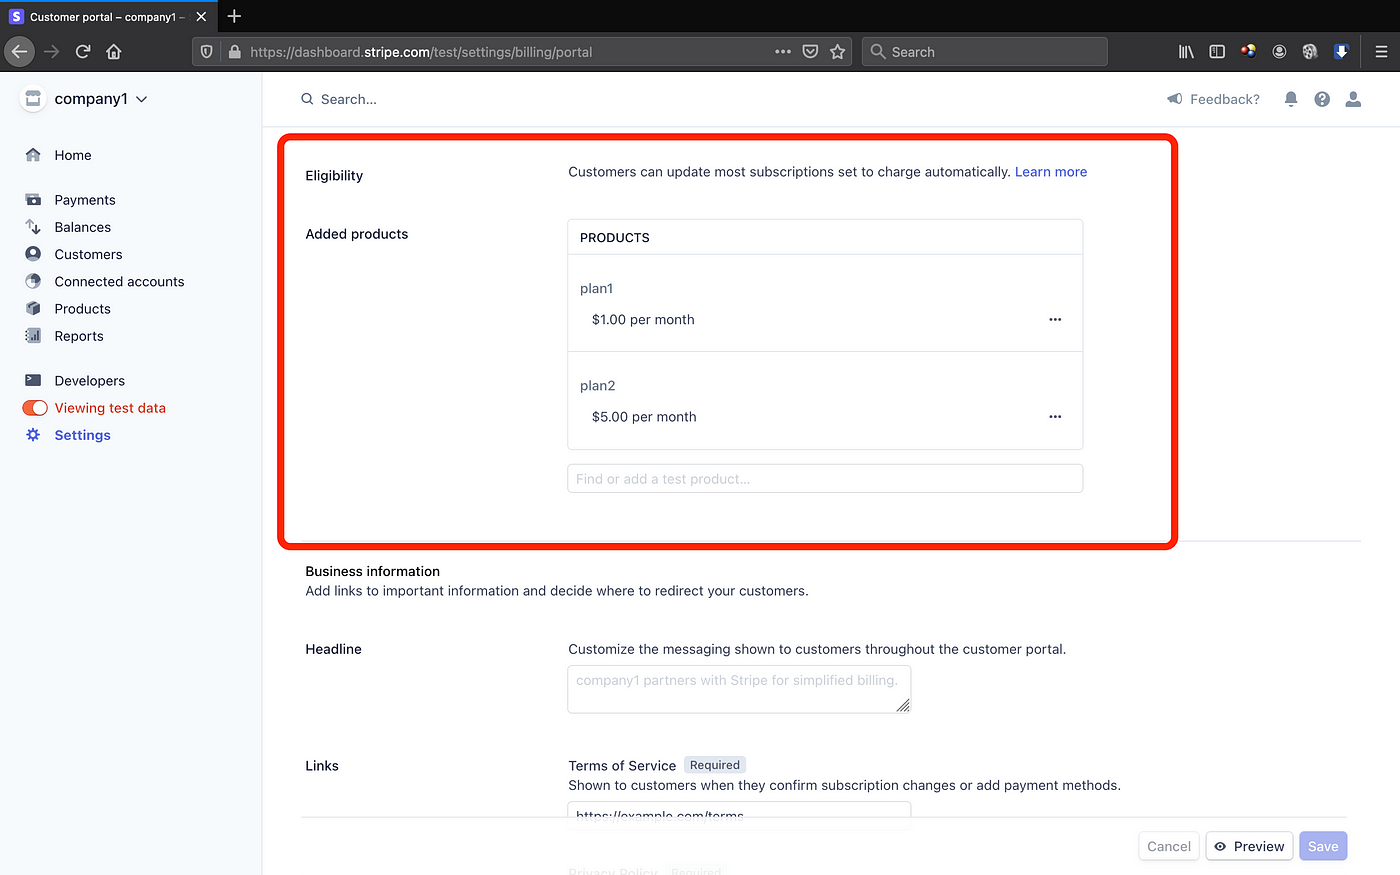

We need to enter "https://example.com/terms" and "https://example.com/privacy" to the "Terms of Service" and "Privacy Policy". At last, we click "Relieve".
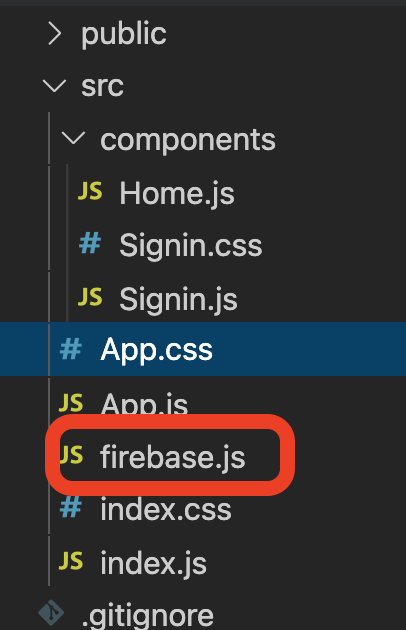
5. Add the firebase config file
We used this project to continue. If y'all created a new project in Firebase, call up you need to copy the config file from the Firebase to yourproject.
Click on the gear icon, and the click on the

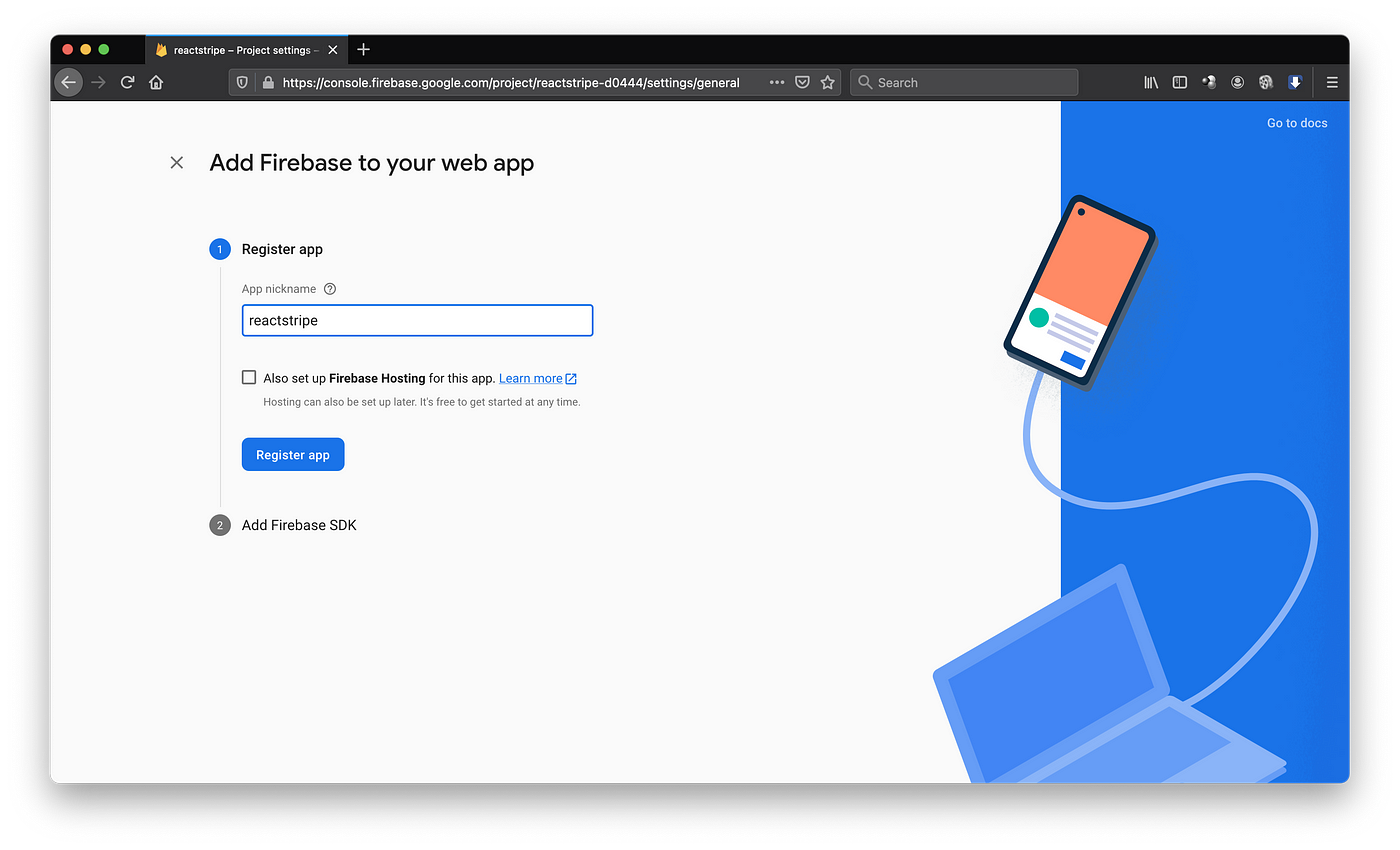
Type an app nickname and click "register app". Then copy the config file to the firebase.js of the project.
6. Get the products and prices from Firebase
Inside Habitation.js, we demand to add together the state "products" and the update function "setProducts".
const [products, setProducts] = useState([]) Since we volition use useState and useEffect, and so we as well need to import them from 'react'.
import React, { useContext, useEffect, useState } from 'react' useEffect(() => { db.collection('products').where('agile', '==', true).get().then(snapshot => { console.log('products snapshot',snapshot) const products = {}; snapshot.forEach(async productDoc => { products[productDoc.id] = productDoc.data(); const priceSnap = await productDoc.ref.collection("prices").get(); console.log('rpiceSnap', priceSnap) priceSnap.forEach(priceDoc => { products[productDoc.id].prices = { priceId: priceDoc.id, priceData: priceDoc.data() } }) }) setProducts(products) panel.log('products', products) }) }, [])
Select those active products, from the snapshot, nosotros tin can see an array of data, can those are the products, we tin see the production id
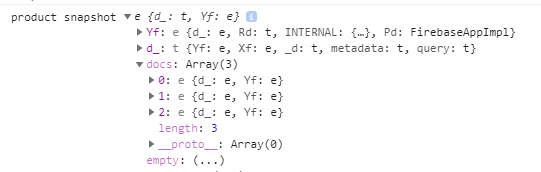
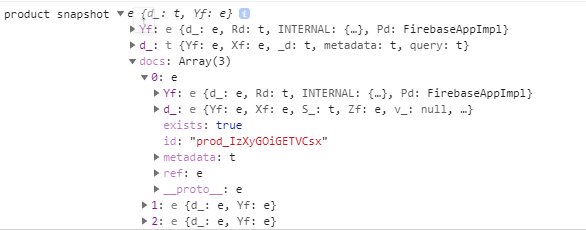
Create an empty products object and and so get the document from the snapshot, prepare the primal value pairs like below.
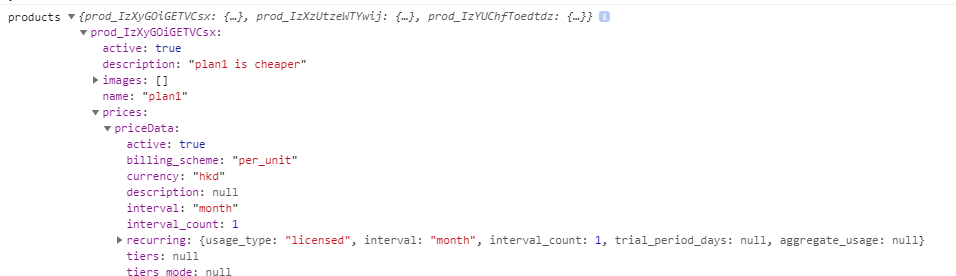
products[productDoc.id] = productDoc.data(); This is because at final we want to go the follow products JSON object, the post-obit is an example of the object.
          {
            "prod_IzXyGOiGETVCsx": {
            "agile": true,
            "proper name": "plan1",
            "role": "plan1",
            "images": [],
            "description": "plan1 is cheaper"
            },
            "prod_IzXzUtzeWTYwij": {
            "images": [],
            "description": "plan2 is more expensive",
            "name": "plan2",
            "role": "plan2",
            "active": true
            },
            "prod_IzYUChfToedtdz": {
            "agile": truthful,
            "name": "plan3",
            "images": [],
            "function": "plan3",
            "description": "plan 3"
            }
}
Since we too desire the go the price data from the firestore, which is inside the subcollection.
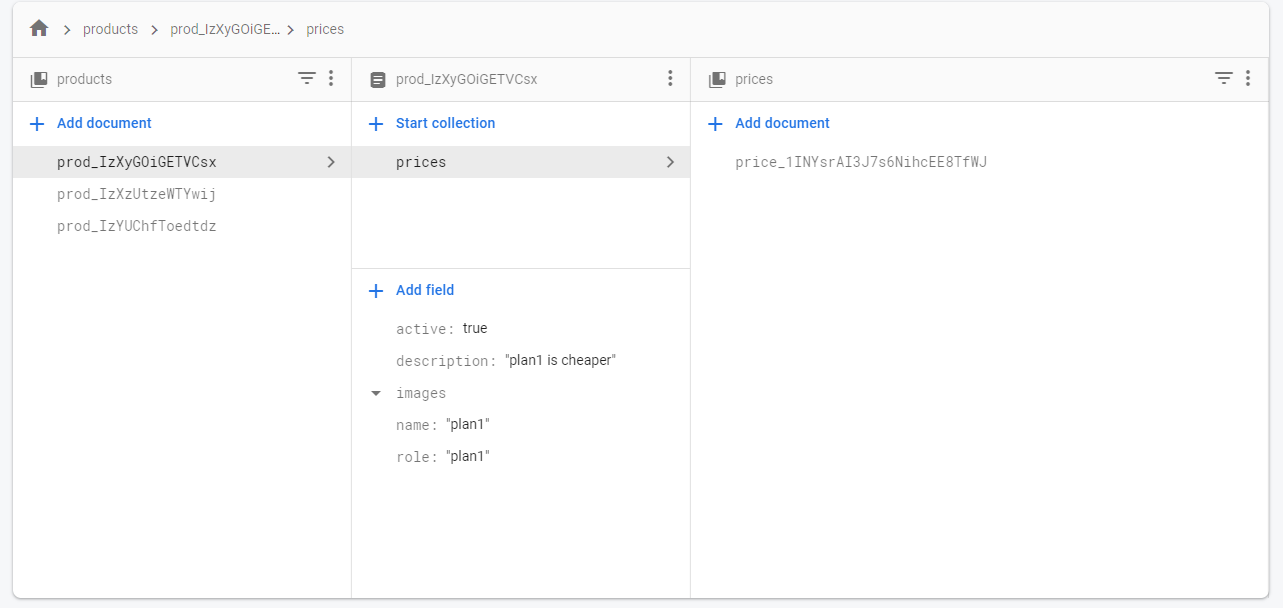
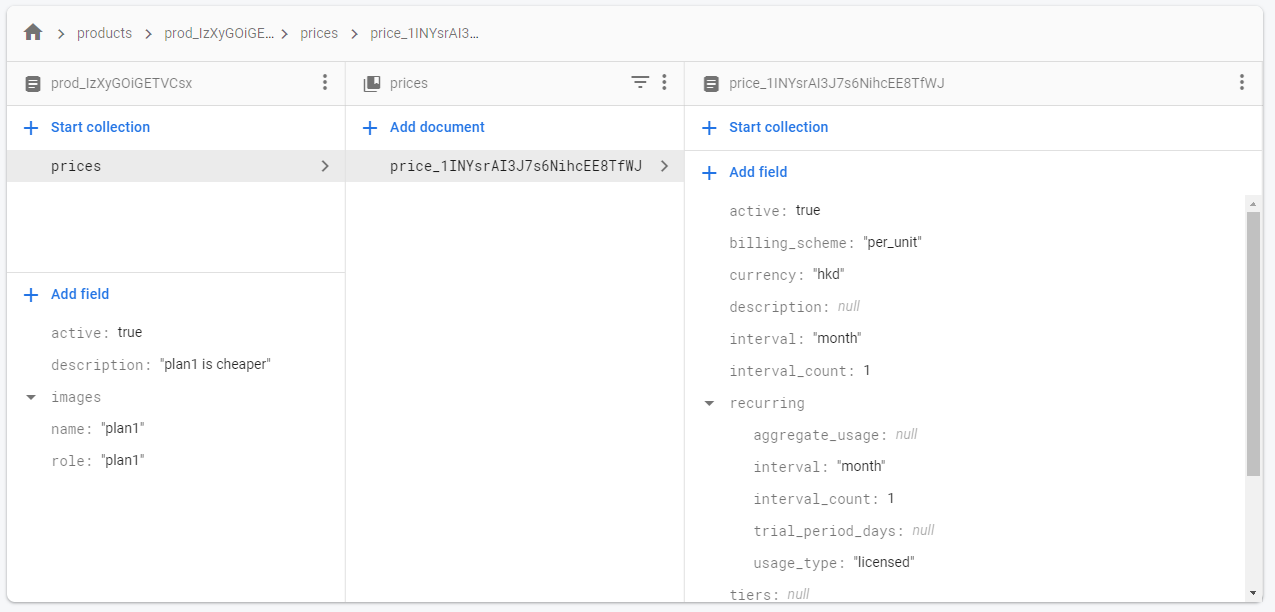
const priceSnap = await productDoc.ref.collection("prices").go(); priceSnap.forEach(priceDoc => { products[productDoc.id].prices = { priceId: priceDoc.id, priceData: priceDoc.data() } })
Get-go we get the snapshot from the subcollection "prices". After that, we get the cost id and price information and store information technology inside products object
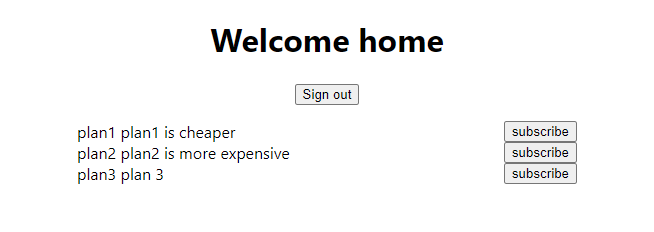
seven. Return the products and subscribe button
Inside the Home.js
render ( <div> <h1>Welcome dwelling house</h1> <p><push onClick={() => auth.signOut()}>Sign out</push></p> {Object.entries(products).map(([productId, productData]) => { render (<div className="plans" key={productId}> <div> {productData.name} - {productData.description} </div> <push button>subscribe</button> </div>) })} </div> )
What is Object.entries?
TheObject.entries()method returns an array of a given object'south own enumerable cord-keyed holding[central, value]pairs, in the same order as that provided by afor...inloop. (The but of import difference is that afor...inloop enumerates properties in the prototype chain as well).
We use the Object.entries to get the key, which is the productId and also the information, which is the productData.
We use the productId as a fundamental of the list item, and we get the product name and the description from the productData.
At last we add the css to the Home.css and import it within the Home.js
import './Home.css'; .plans{ display:flex; justify-content: infinite-between; margin-left: machine; margin-right: auto; max-width: 500px; }
8. Load checkout
Since we will add data to the user or customer, we need to go the user data.
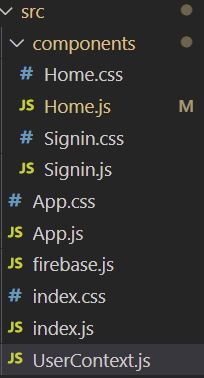
We demand to create UserContext.js under the src folder.
Within the UserContext.js
import {createContext} from 'react'; export const UserContext = createContext(null)
Back to the App.js, we need to import the UserContext
import {UserContext} from './UserContext'; After that, nosotros apply the UserContext.Provider to wrap the whole content. The provider will pass the value "user" to the components.
return ( <div className="App"> <UserContext.Provider value={{user}}> {user ? <Home /> : <Signin />} </UserContext.Provider> </div> );
Inside the Domicile.js we tin get the value "user" past import the useContext from react and import the UserContext.
import React, { useContext, useEffect, useState } from 'react' import { UserContext } from '../UserContext'; const { user } = useContext(UserContext)
After we already get the user data, we tin continue to create the loadCheckout office, we volition bind this function to the subscribe button. Since nosotros need to use the stripe package at this role, so permit's install information technology by inbound the following command in last.
npm i @stripe/stripe-js const loadCheckout = async (priceId) => { const docRef = await db.collection("customers").doc(user.uid).collection("checkout_sessions").add together({ toll: priceId, success_url: window.location.origin, cancel_url: window.location.origin }) docRef.onSnapshot(async (snap) => { const { error, sessionId } = snap.data() console.log('error sessionId', mistake, sessionId) if (error) { alarm(`An fault occured: ${error.message} `) } if (sessionId) { console.log('sessionID', sessionId) const stripe = await loadStripe("pk_test_51INW8eAI3J7s6NihgTfXwK6LckSo4tEJ1WhsoUmWGDftnJOBlXAXCSAqCVkSw89xsgAQjvtpMCTjTMknulKZ2wj900Nus791uw") stripe.redirectToCheckout({ sessionId }); } }) }
Beginning, we will add the priceId, success_url and the cancel_url to the customers
const docRef = await db.collection("customers").doc(user.uid).drove("checkout_sessions").add together({ price: priceId, success_url: window.location.origin, cancel_url: window.location.origin })
Side by side, when there is a alter in content, it will create a checkout session.
If there is checkout session, and then it will create an instance of the Stripe object with the publishable API cardinal.
loadStripe("pk_test_adsfdsafdsafdsafdsafsadfadfdsafasdfsdafsafsad") (Nosotros can get the publishable API central from the Stripe)
It will redirect the customers to the checkout page.
stripe.redirectToCheckout({ sessionId }); At last, we demark the part to the subscribe push
<button disabled={isCurrentPlan} onClick={() => loadCheckout(productData.prices.priceId)}>subscribe</button> 9. Check the current plan
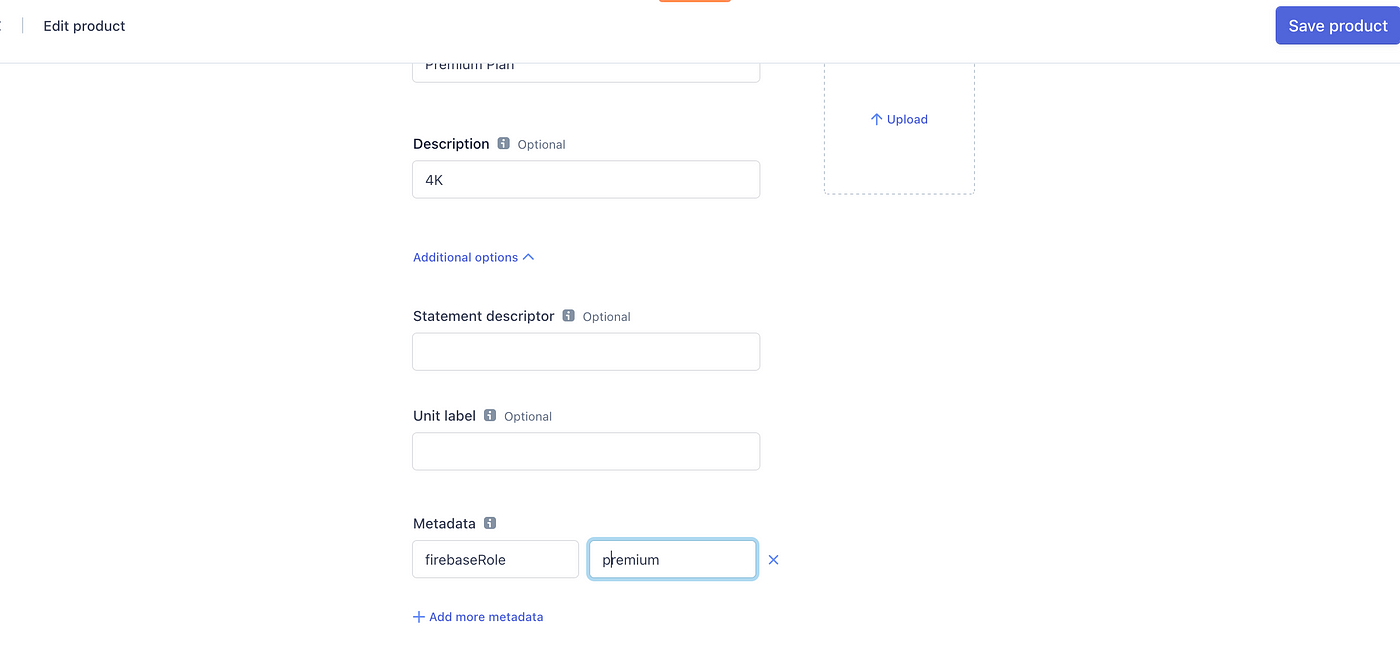
To check the whether the plan is subscribed, we need to add together a firebaseRole to the metadata to the programme.
To add the firebaseRole, we tin can click on the name of the production, and click "edit Metadata", add the value of metadata of plan1 to plan1, plan2 to plan2 and plan3 to plan3.
If the client subscribe the plan3, he will get a backdrop role which is plan3 within the firestore, so later we tin compare this function and the proper name of the plan, if they are the same, then we can conclude that he subscribed that plan and and so disable the respective "subscribe" button.
Now after recreate a new user and subscribe a new plan, you tin come across at that place is a role property "plan3" at present if the customer subscribed plan3.
10. Check if this is electric current plan
In this office, we are going to check whether this specific plan is the customer subscribed.
To bank check which plan is the customer subscribe, we need to compare the product name and the customer office.
Kickoff, we need to add the state of subscription.
const [subscription, setSubscription] = useState(null); Then we need to fetch data from the "subscription" collection
useEffect(() => { db.collection('customers').physician(user.uid).collection('subscriptions').get().and then(snapshot => { console.log('snapshot', snapshot) snapshot.forEach(subscription => { panel.log('subscription', subscription.information()) setSubscription({ role: subscription.information().office, current_period_start: subscription.information().current_period_start.seconds, current_period_end: subscription.data().current_period_end.seconds }) }) }) }, []) const isCurrentPlan = productData?.name?.toLowerCase().includes(subscription?.role)
If the programme is the user subscribed, then we volition disable the button.
<button disabled={isCurrentPlan} onClick={() => loadCheckout(productData.prices.priceId)}>subscribe</button> Free YouTube tutorial:
Follow usa:
https://www.linkedin.com/company/ckmobi/
https://twitter.com/ckmobilejavasc1

How To Register User Using Strip Checkout + Auth0,
Source: https://javascript.plainenglish.io/using-stripe-payment-with-firebase-9dc0a7c82080
Posted by: whitehatian.blogspot.com
0 Response to "How To Register User Using Strip Checkout + Auth0"
Post a Comment